Acoustic Research XA #2

After getting the first Acoustic Research XA completed and set up with a Shure M97xe cart, I thought the sound was less than spectacular. Surely the arm was to blame. The AR XA was meant to be an excellent and easy to use turntable, but the arm leaves much to be desired. With the M97xe cartridge, I noticed quite a bit of tracking distortion, particularly toward the end of records. Between the questionable Delrin bearings, plastic headshell, and lack of anti-skate, it was no wonder why it sounded the way it did.
Of course there was the option of spending a day or two tweaking and futzing to get it to work at it's peak of performance (and maybe it would have been worth it), but I felt that my efforts would be better spent on the other XA that was sitting in the basement.

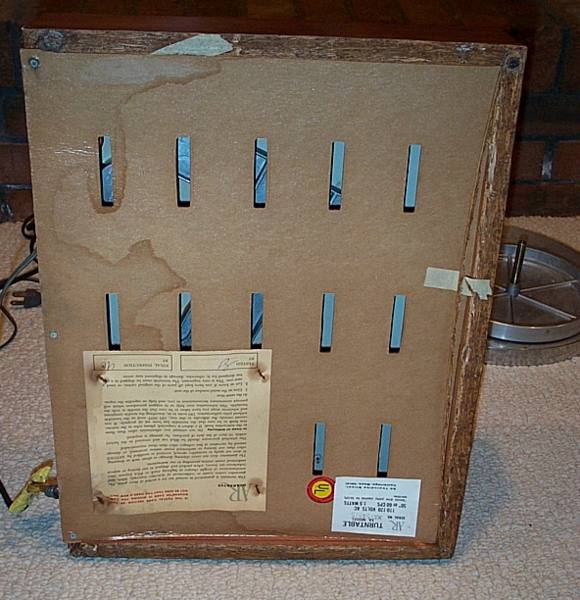
XA #2 was, IMO, completely non-restorable. This XA's arm wand was super glued to the pivot, the headshell was stripped, and the "oiled walnut" base was nothing more than walnut veneer on water damaged and delaminating chipboard. This turntable was the perfect candidate for modification.
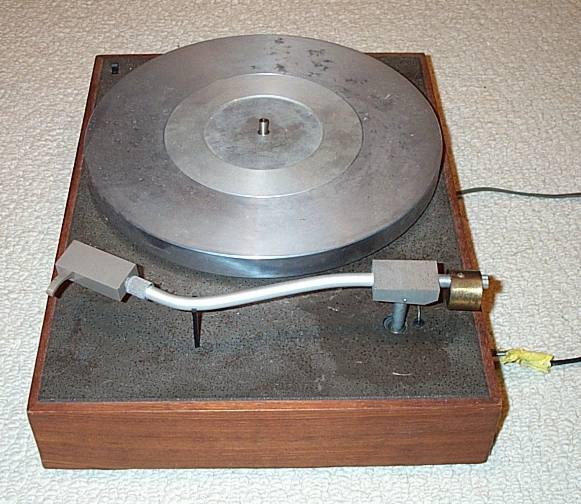
First order of business was to figure out what arm I wanted to use, and then figure out how to mount it on the subchassis. I had two arms on hand (yeah, picture that!); a very nice knife bearing straight tonearm with a detachable headshell that I call the "Mystery Arm", and another knife bearing, low mass tonearm from a Luxman PD-272. The Luxman arm won out simply because there were a couple of specs available and because the Mystery arm was, well, a mystery.
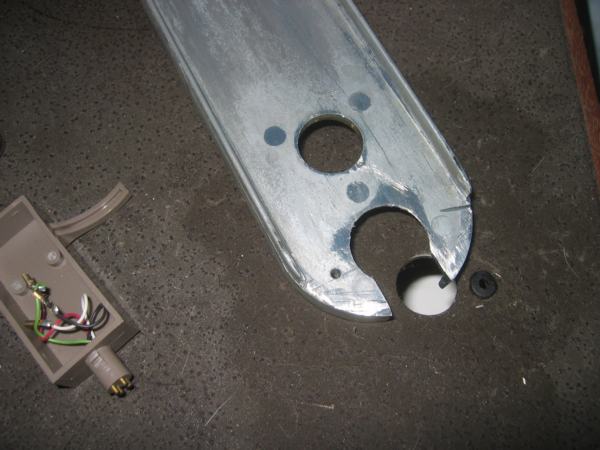
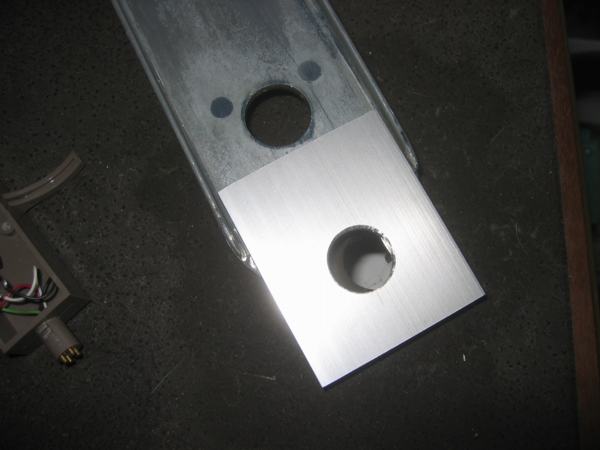
The good thing about both of the arms were that they did not have the same shaft mount as a Black Widow or Formula 4, but instead had a simple three screw base mount, requiring only a flat surface. I extended the length of the subchassis by first drilling out the old arm spindle cup, cutting a slot from the hole to the edge, and then removing the upper part of the radiused lip. With the exception of using a big-ass drill bit to remove the arm spindle cup (and no more), a hacksaw was used to remove the rest of the metal, and just a small amount of filing was needed to smooth things out. The object was to remove as little metal as possible and then create a smooth surface for a flat chunk of aluminum to mount the arm and effectively extend the length of the subchassis.
At this point there was quite a bit of time spent on measurements to make sure that the arm would indeed fit. I found 2" wide x 1/8" thick bars at Home Depot that were perfectly suited to the task. A chunk of the bar was cut, drilled, and then temporarily mounted to the sub-chassis with double sided tape for fitting purposes.
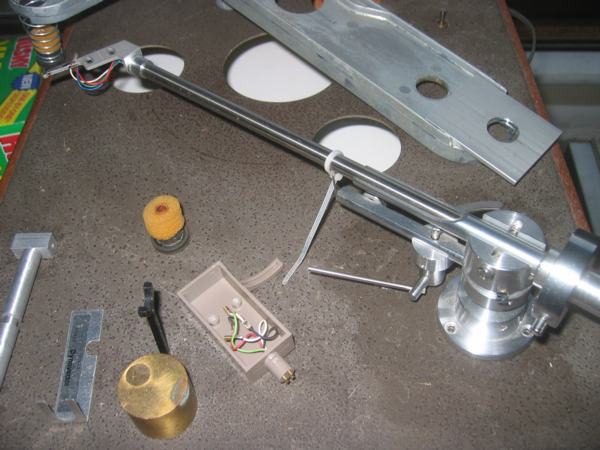

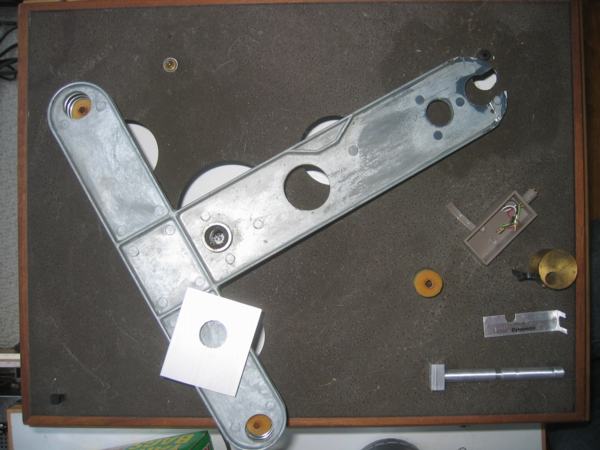
After test fitting, it became clear that the weight of the arm along with the new mounting point (approx 2cm from the spindle center) was just too much for the springs. The new arm almost completely compressed the original spring nearest the arm. After a few tries with non-turntable springs, I found the right ones from Anthony Scillia. Anthony, by the way, has been working closely with George Merrill (a well known developer of AR turntable modifications), and is presently selling some of his own modifications. To counter the weight of the arm and further balance the assembly, I added 9oz of lead wheel weights to the arms nearest the platter. In addition to adding mass to the sub-chassis, the lead weights will also damp some of the resonance.
To allow the new arm to fit the deck, I punched a 1-1/2" hole in the top plate with a ball bearing hole punch set.
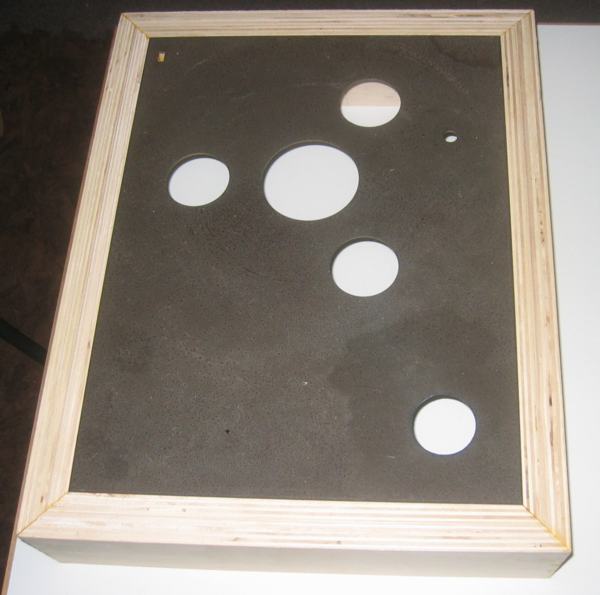
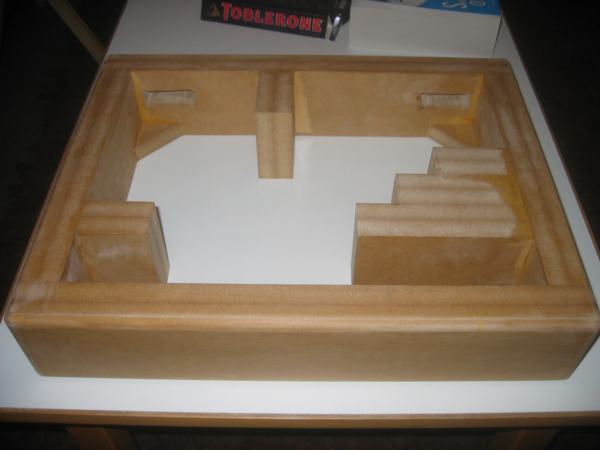
Most of the basic metal work was completed at this point, so it was time to build a new, more massive base. I had a pretty clear idea of what I wanted to do, both conceptually and astheticly; this was ultimately realized in MDF since my attempt at using Home Depot birch ply was largely unsuccessful.
The conceptual part of the the idea was to affect the resonant character of the top plate by using an aperiodic bracing approach (picked up from North Creek Music) and so avoiding the use of damping materials. The asthetic part was to try to make the turntable look like laboratory equipment, that is; stylisticly difficult to place in time.....kinda like McIntosh.

The top plate was given a couple of coats of a darkish grey satin. The base was routed, filled, sealed, and then a few coats of a lighter grey flat paint were applied. The two tone grey gives the table an industrial surplus look that I like, thuough I was expecting it to be even darker.
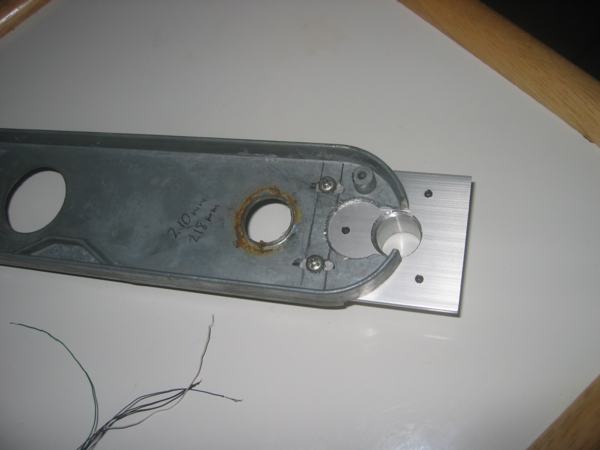
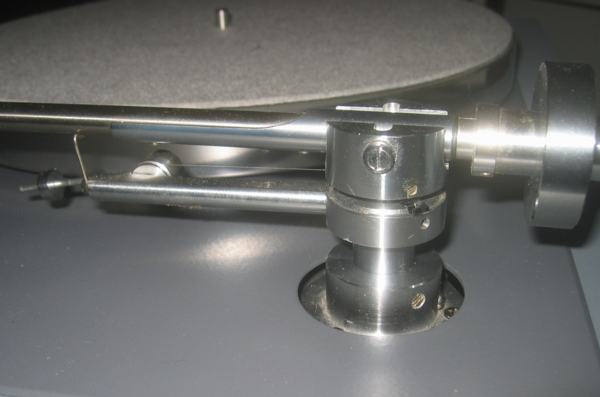
The arm was attached, platter cleaned & shimmed up 3/16" below the Delrin spacer to give the arm base room between the top plate and subchassis. Incidently, you'll notice that the cueing device has been removed from the arm - this was also to make more room for the arm. Unfortunately, the arm was designed to be used with the cueing lever and is difficult to handle without it.
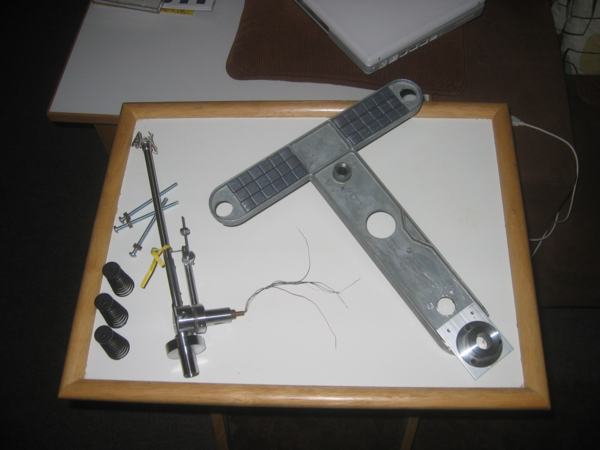
The electrical connectors were mounted on 1/16" aluminum plates which in turn were mounted to the rear of the unit. The suspension was roughed in at this point as well as the cartridge alignment. I was finally able to play my first record on this table which was Sly and the Family Stone - Stand!; not the best recording to evaluate a turntable, but quite suitable for continuing the cartridge break-in process.
Page created by James L Woodley © 2004, 2005 Page last updated 09 July 2005